Materials
- PLA can work surprisingly well in moderate ambient temperatures and is easy to print
First layer adhesion
The board segments are large relative to the printer hot plate size and have thin elements at the edges, which can have the tendency to curl up during the printing process.
Things that may help getting a nice sticky first layer and prevent curling up:
- Clean hot plate: wash with soap AND wipe with IPA
- Enable outer and inner brims
- Use slower speed for the first layer: I use about 30-40% slower speeds compared to defaults in Bambu Studio (X1C printer)
- Bump up the hot plate temperature a notch: I use +65°C with PLA (vs. default of +50-60°C)
Known working settings for Bambu Lab X1C / PLA in Bambu Studio
- All prints I’ve made so far have been with a 0.40mm nozzle and 0.20mm layer height
- Strength -> Initial layer: 50 mm/s, 100 mm/s for infill
- Strength -> Wall loops: 3
- Strength -> Infill density: 15%
- Strength -> Sparse infill pattern: Gyroid
- Support: Disable supports for all provided models
- Others -> Brim type: Outer and inner brim
- For board segments, may possibly be needed for some other models as well
- Filament settings -> Textured PEI plate: +65°C
- Filament settings -> Cooling: Auxiliary part cooling fan -> Fan speed: 0%
- This fan is guaranteed to mess up your PLA prints
- Part orientation: hooks and shelf braces should be lying on their side on the hot plate - they are designed to be printable this way, even without any supports
- Varible layer height: helps with hooks that are printed laying on their side - can also use supports, although they are not stricly necessary
Stacked prints in Bambu Studio
Using a secondary support filament can make printing batches of board segments a lot less worksome. Stacked example print configurations are provided among the downloadable models.
Here’s the somewhat annoying process of setting up a stacked print in Bambu Studio:
-
Create a thin part used as the support layer
- Load a board segment in Bambu Studio
- Use the cutting tool to slice the board segment into a 0.20mm (or your layer height) tall bottom part and the rest of the board as the top part
- Delete the top part
- Right-click on the 0.20mm bottom part and select “Export STL”, save it as “Board support.stl”
-
Create a sandwich structure with board + support
- Start with an empty plate
- Load a board segment on the plate
- Move the board segment around so that it is fully inside the printable area, very close to the back side of the hot plate
- Assign the primary printing filament for the board segment
- Right-click on the board segment, select “Add modifier -> Load…” (DO NOT select “Add part”)
- Select the “Board support.stl” created earlier
- The support slice should load right next to the full board segment
- Now comes the tricky part: moving the support slice on top of the board segment
- Select the support slice, change it to use the support filament and select “Move”
- Observe the coordinates provided: X is likely greater than zero, Y=0 and Z is something funky. Let’s say the numbers are X=253.54, Y=0, Z=-2.90 for this exercise
- Change X to “0” and the support slice will move to the bottom of the (upcoming) board stack
- Change Z to old_value + stack_height, so in the case of the first board, -2.90 + 6 = 3.1mm - This value should move the support slice perfectly on top of the board segment
- Now the entire stack is 6mm + 0.2mm = 6.2mm tall
- Right-click on the support slice and select “Change type”, select “Part”
-
Next add a board segment on top of the stack
- Use the same process as in the previous step with the “Board support.stl”, but now use the full board segment STL
- When it comes to moving the board segment on top of the stack, remember to move it upwards by 6.20mm, because there’s the 0.20mm support layer on top now
- After this the full stack height will be 6mm + 0.20mm + 6mm = 12.2mm
-
Keep stacking board segment, support slice, board segment, support slice, … until you are happy with it
-
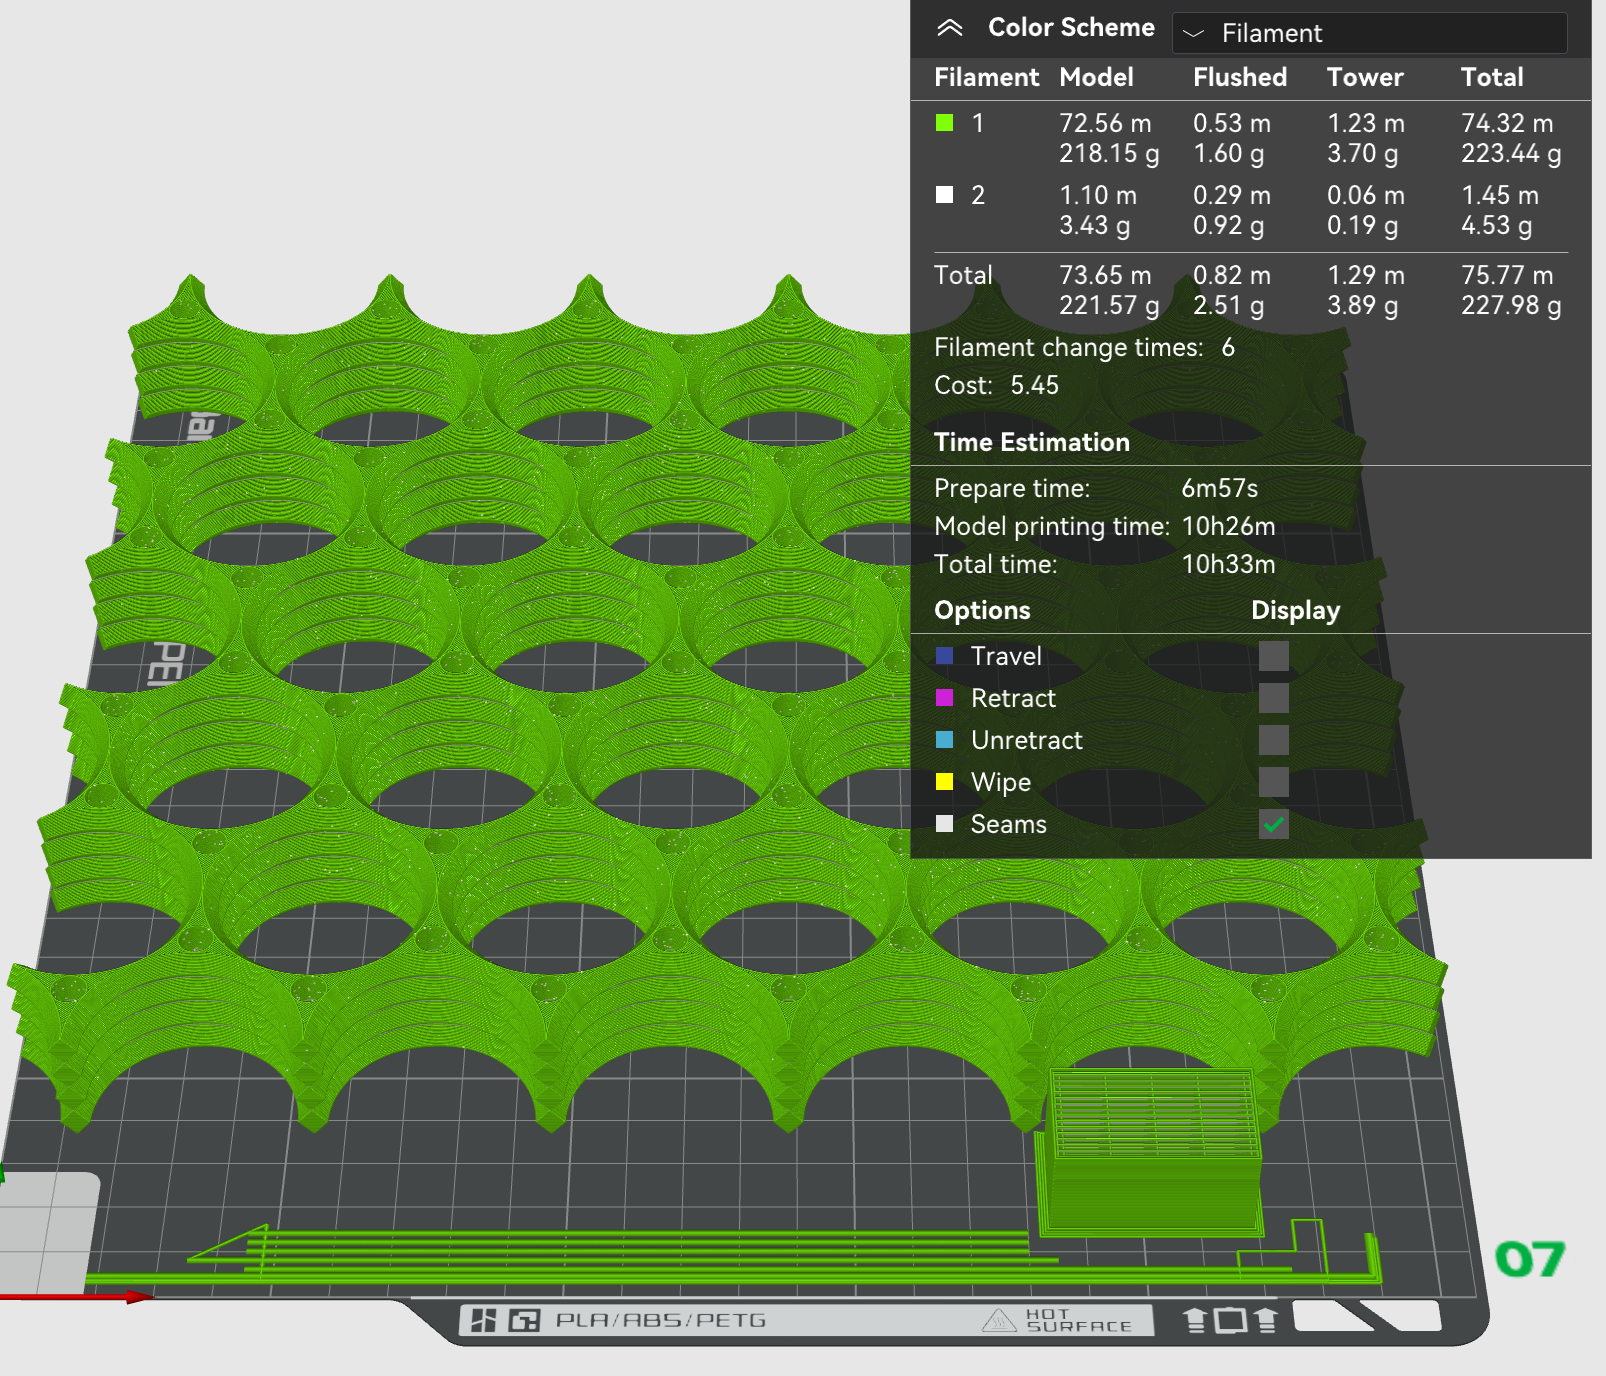
Finally, the prime tower has now likely been activated as two filaments are being used
- Move the filament tower to the front edge, it should barely fit there if the board stack is far enough back
The end result should look something like this (note the prime tower at the front):
